
If you have a long chunk of text and you just want to put a background image or a watermark on a document, then this method is best for you.
 an image in Word " width="911" height="754" />
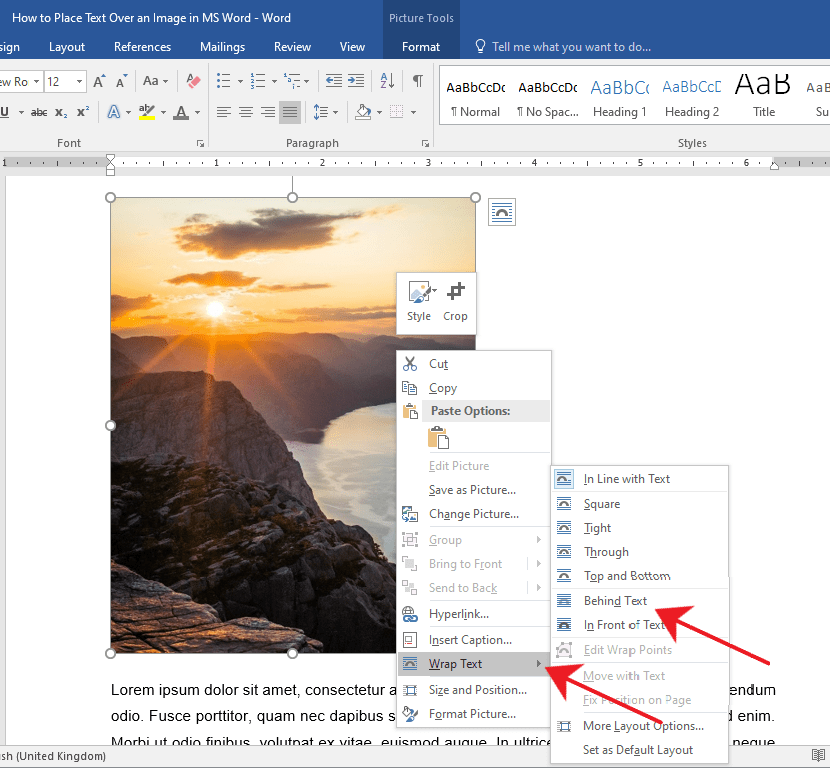
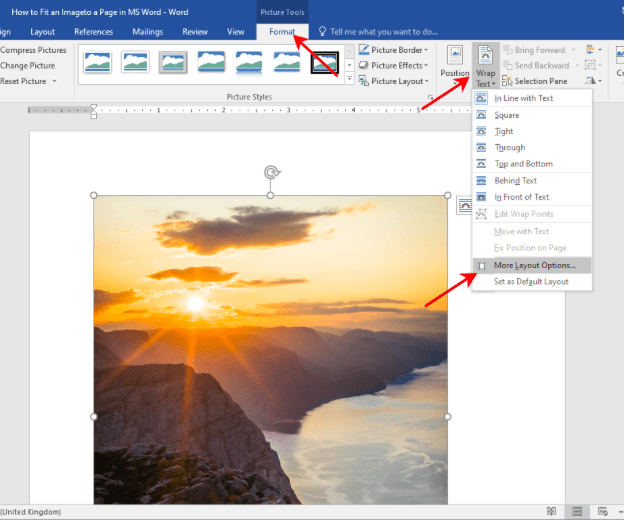
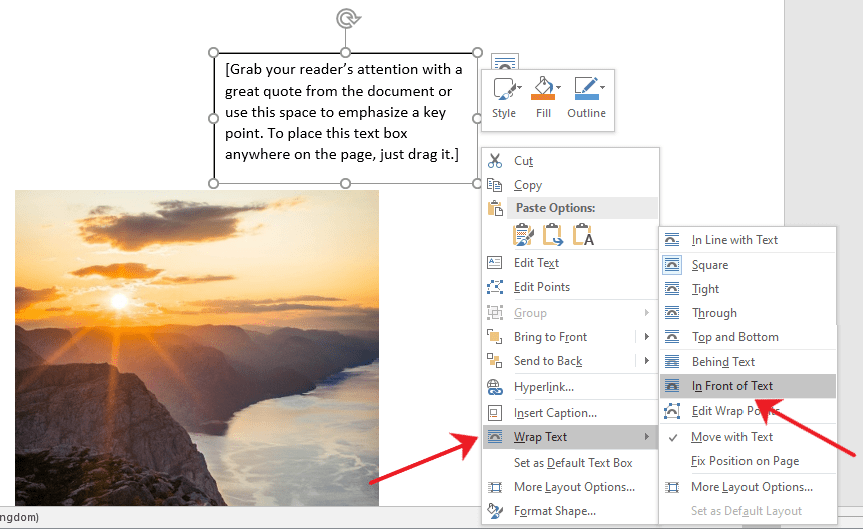
Right-click on the image and select the Wrap Text option.
This will display a horizontal drop-down menu on the right. Once you see the drop-down menu, select Behind Text.
You’ll notice the images and text will rearrange automatically as you hover over the text wrapping options.
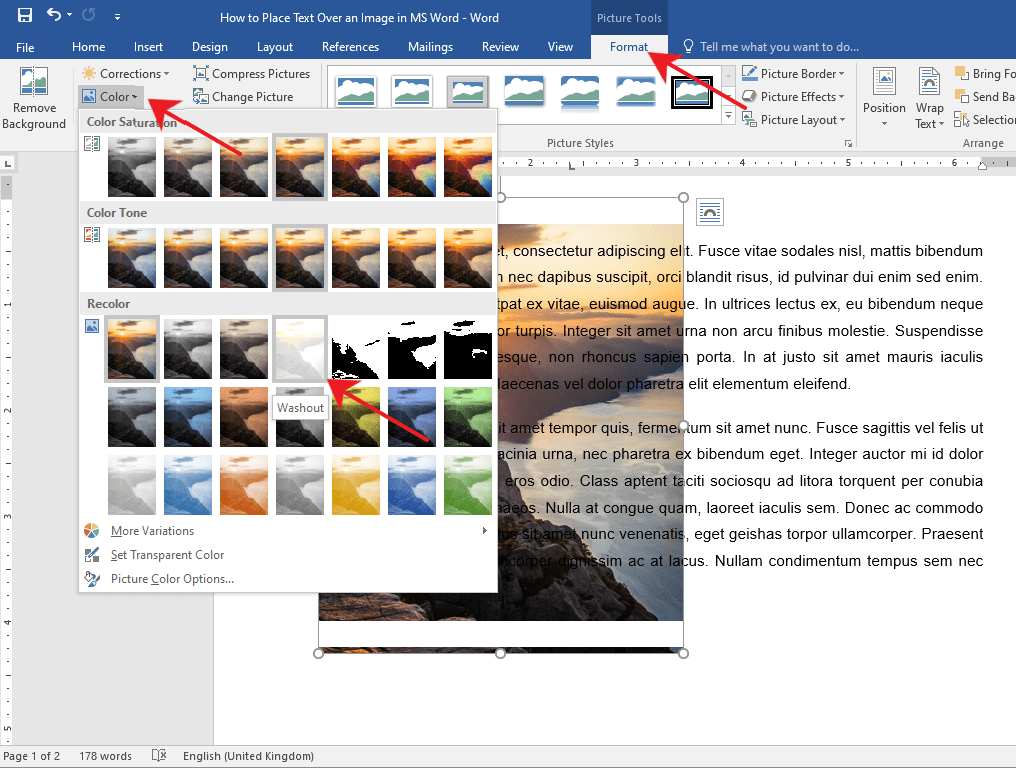
If after you’ve inserted a background image and the text becomes unreadable, you can change the image’s opacity or color.
Simply double-click on the image to activate the Format tab in the Ribbon.
After that, click on the Color drop-down menu and select Washout under the Recolor group.
You can also get creative and explore other options to suit your needs.
Go to the Insert tab on the Ribbon.
Now, navigate to the right side of the Ribbon and click on the Text Box drop-down menu.
Then, select a text box style of your preference. For this example, we’ll use the Simple Text Box.
Type in the text that you want to put on top of your image.

Select the text box and click the Layout button found at the upper right-hand corner of the text box.
Then, select the In Front of Text option.
Click and drag the text box to place it over your image. You’ll notice that your text box has a background color by default and is covering a part of the image.

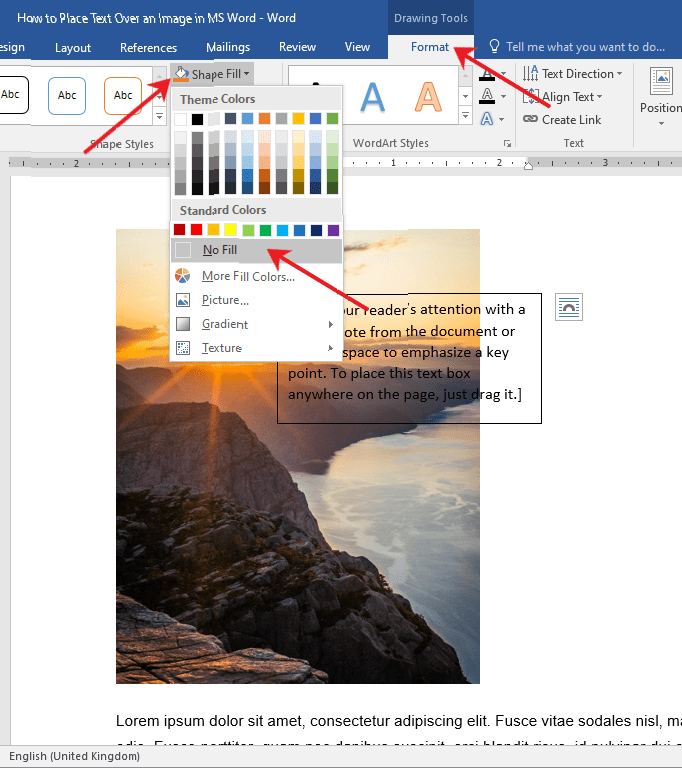
You can change your text box’s background and border color by accessing the Format tab.
This way, only the text will be visible on top of your image. Now, Double-click the text box and go to the Format tab.
From there, click on the Shape Fill drop-down menu and choose No Fill.
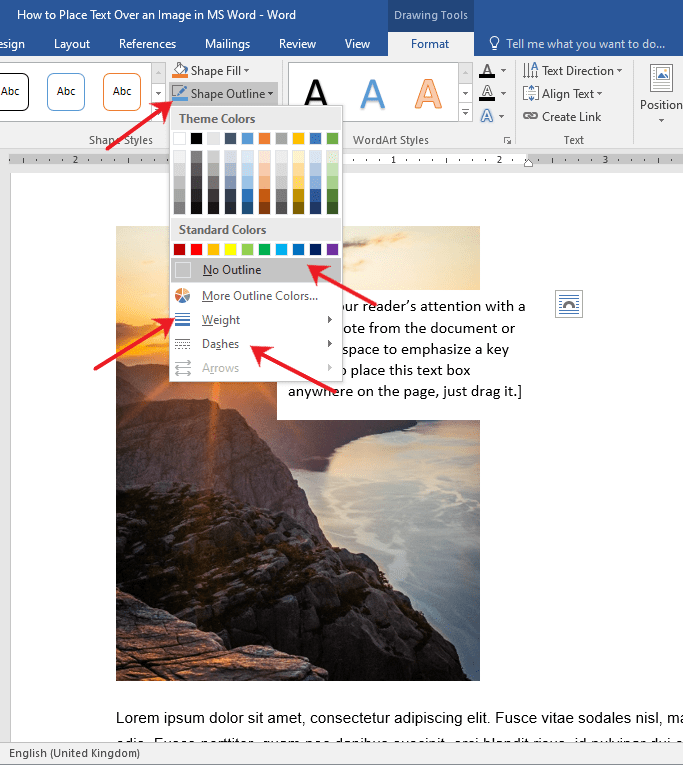
To change the border color, select the Shape Outline drop-down menu and choose No Outline.
You can also change the border’s weight and design by exploring the Dashes and Weight options.
If you find yourself needing to put a title, a name, or a couple of words over an image, then this method has got you covered.

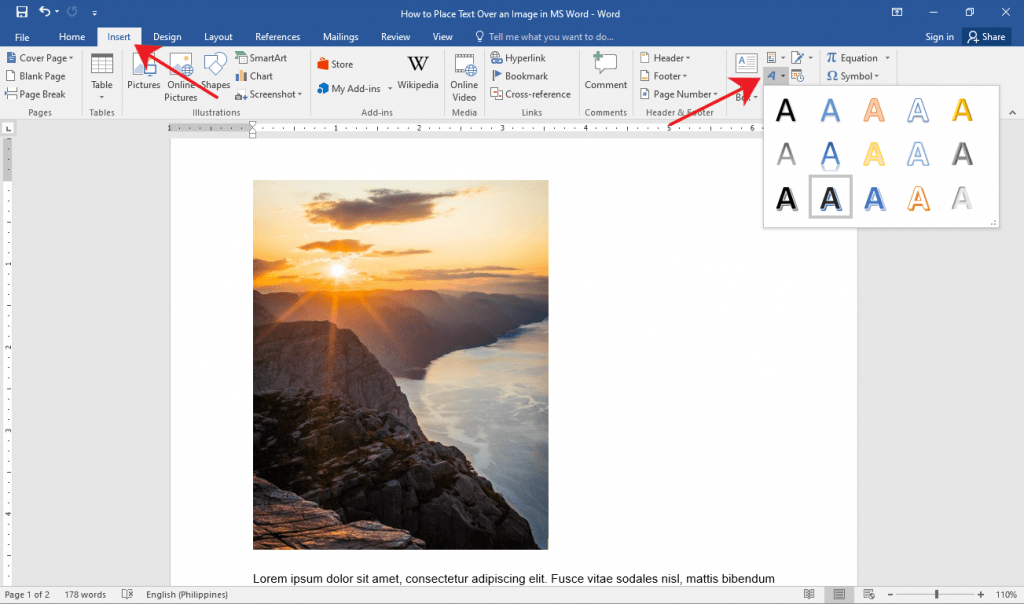
Click the Insert tab on the Ribbon.
Now, click the WordArt button found at the right side of your screen.
It’s the slanted letter A icon under the Text group. After that, choose a WordArt that suits the style of your document.
Click on the WordArt and type in the text you want.
From there, select and drag the WordArt to easily move it around to the perfect location on your document.
You can also resize the WordArt like any other text box by grabbing either one of its corners.

Tip: If you’re using a pen or touch-enabled computer, you can directly write text over an image using the Draw option.
If you used Method 1, simply select the erroneous text and edit or delete it just as you would with any other text.
For Methods 2 and 3, click on the inside of the text box or the WordArt and start editing.
If you want to delete the entire text box or WordArt, click on any of the borders of the text box or WordArt and hit the Delete button on your keyboard.
That’s the rest of it. We hope you’ve found this article helpful!